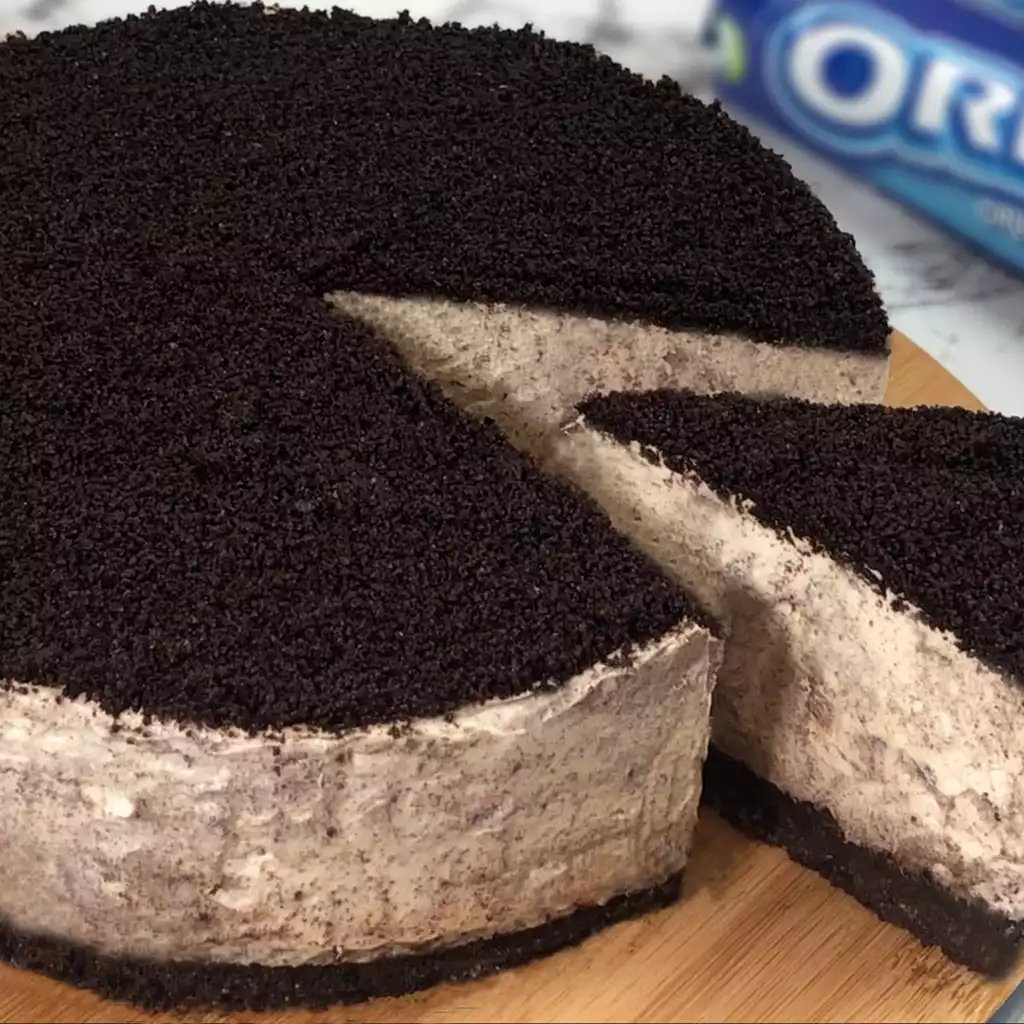
Indulge in the velvety delight of a homemade Oreo Cheesecake, a heavenly treat that marries the richness of cream cheese with the irresistible crunch of everyone’s favorite chocolate sandwich cookies.
This recipe is a testament to the joy of baking, offering a delightful blend of creamy texture and decadent flavor that’s sure to captivate your taste buds.
Originating from the classic cheesecake tradition, this Oreo-infused variation adds a modern twist, making it a popular choice for dessert lovers of all ages.
Despite its gourmet appeal, crafting this delectable cheesecake is surprisingly simple, making it an ideal choice for both novice and experienced bakers alike.
Expert Tip: For a neat presentation, run a knife around the edge of the cheesecake before removing it from the springform pan. This helps to release the cake without damaging the edges.
Oreos: These iconic chocolate sandwich cookies serve as the foundation of our Oreo Cheesecake, providing a rich cocoa flavor and a satisfying crunch to the biscuit base. Their sweet and slightly salty taste perfectly complements the creamy filling, ensuring each bite is a harmonious blend of textures and flavors.
Butter: Melted butter binds the crushed Oreos together, creating a firm and flavorful base for our cheesecake. Its rich, buttery taste adds depth to the biscuit layer, enhancing the overall indulgence of the dessert.
Double Cream: This luscious dairy ingredient forms the creamy backbone of our cheesecake filling, lending a silky-smooth texture and a luxurious mouthfeel. Whipped to soft peaks, double cream adds a lightness to the dessert while providing a rich dairy flavor that balances the sweetness of the other ingredients.
Cream Cheese: A staple in cheesecake recipes, cream cheese brings a tangy and creamy flavor to our dessert, serving as the primary ingredient in the filling. Its smooth consistency and mild acidity complement the sweetness of the Oreos and sugar icing, creating a harmonious blend of flavors in every slice.
Sugar Icing: Sweetened icing sugar adds a delicate sweetness to the cream cheese filling, balancing the tanginess of the cream cheese and enhancing the overall flavor profile of the cheesecake. Its fine texture ensures a smooth and creamy consistency, allowing the filling to set perfectly as it chills in the refrigerator.
Vanilla Extract: A touch of vanilla extract elevates the flavor of our Oreo Cheesecake, imparting a warm and aromatic essence that enhances the sweetness of the dessert. Its subtle undertones of vanilla bean add depth to the filling, creating a more complex and satisfying flavor experience.
Additional Oreos: Finely chopped Oreos are folded into the cream cheese filling, providing bursts of chocolatey goodness throughout the cheesecake. These extra cookies not only add texture but also intensify the Oreo flavor, ensuring that each bite is brimming with irresistible cookie goodness.
Expert Tip: Avoid overmixing the cream cheese filling to prevent it from becoming too dense. Mix until all ingredients are just combined.
Expert Tip: Make sure to crush the Oreos finely for the biscuit base to ensure a smooth and even texture.
Yes, you can use reduced-fat cream cheese if you prefer a lighter version of the cheesecake. However, keep in mind that it may affect the texture and richness of the filling slightly.
It’s best to refrigerate the cheesecake for at least 4 hours, preferably overnight, to allow it to set properly and develop its full flavor. This chilling time ensures a firm and creamy texture that holds together when sliced.
Yes, you can freeze leftover cheesecake slices for up to 1 month. Wrap individual slices tightly in plastic wrap and aluminum foil before placing them in a freezer-safe container. Thaw overnight in the refrigerator before serving.
Here are some more recipes for you to enjoy! If you my recipes don’t forget to rate and leave a comment.
If you have any recipe suggestions, please do not hesitate to ask me. A great way to stay in contact with me is through Instagram, Facebook, Twitter and YouTube. Don’t forget to tag me @CookwithNabeela in your recipe photos!

Subscribe now to receive my latest recipes directly in your inbox. Stay up-to-date and never miss out!

I love to cook! I want to share with you my favourite, delicious family-friendly recipes. I want to inspire you to create fantastic food for your family every day.
Latest comments (4)
An absolute winner! Everyone loved it so much thank you for sharing this dessert.
Thanks Zub,
I’m glad you enjoyed my recipe. Thanks for trying out my recipes 🙂
I made this, it was amazing, only difference was I reduced the sugar to 50g because I don’t like sweet things.
Thank you so much for trying out my recipe! That’s a very good idea if you want to have less sugar 🙂